We may earn revenue from the products available on this page and participate in affiliate programs. Learn More ›
Like many hunters, Joseph Wolfe was comfortable enough taking a shot at a game animal 150 yards away or less. In fact, most of his shots in his ten years of hunting in his home state of North Dakota were under 100 yards. But he wanted to be able to extend his range, to be able to make an ethical kill out to 300 or more yards. But how to acquire that skill? He went back to school.
In this case, Wolfe and his father, Joe Wolfe, took the two-day Long Range Shooting School especially designed for hunters and offered by Outdoors Solutions. A Tulsa, Oklahoma-based company providing sportsmen with hunting and fishing trips, Outdoor Solutions holds the course numerous times a year at locations in Michigan, Texas, and Utah.
Greg Ray, Outdoor Solutions founder and co-owner, said the idea for the course came about when he was booking clients for guided hunts in Western States a number of years ago. When Ray explained that a 400-yard shot on a deer, elk, or pronghorn might be needed, given the wide-open spaces of the West, some of the clients became very upset.
“They would say, ‘Are you kidding me? I’ve never shot that far in my life!’” Ray said. “And some of those people would decide against booking a hunt.”
Seeing a need, Ray and his staff launched the Long Range Shooting course several years ago. The first courses filled within days. What started as a handful of courses a year has grown to 20 to 25 annually, with class sizes increasing from eight to ten a class to 15 or more.
I attended a course in June, held in the mountains outside of Coalville, Utah, and there I met Joseph Wolfe and his father. Joseph had recently received his bachelor’s degree and Dad arranged the class as a graduation present for his 22-year-old son. The young man admitted to being nervous about the event.
“The course description said we’d be shooting out to 1,000 yards,” Wolfe told me. “I really didn’t know if I could do anything close to that and was pretty sure I’d fail.”
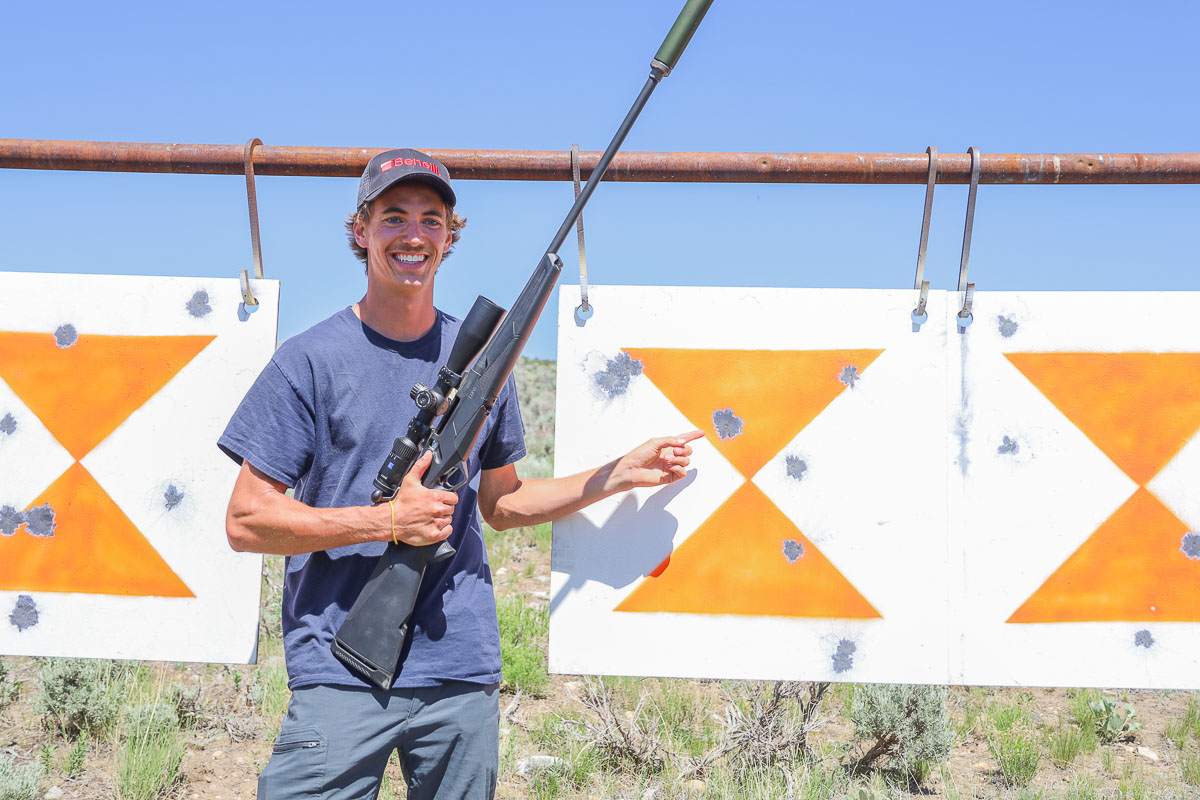
He did not fail. By mid-afternoon on Day One, Wolfe was consistently banging a 3 MOA (30 inch) steel target at 1,000 yards.
Ballistic Prep
Our long-range course actually started the evening before Day One, after dinner. There were 15 of us taking the course. We listened to an introduction by Ray, followed by lead instructor Erik Lund explaining exactly we’d be doing the next day.
We also downloaded the Ballistics ARC shooting app, from GEO Ballistics, onto our cell phones, and Lund showed us how to use it the next day at the range.
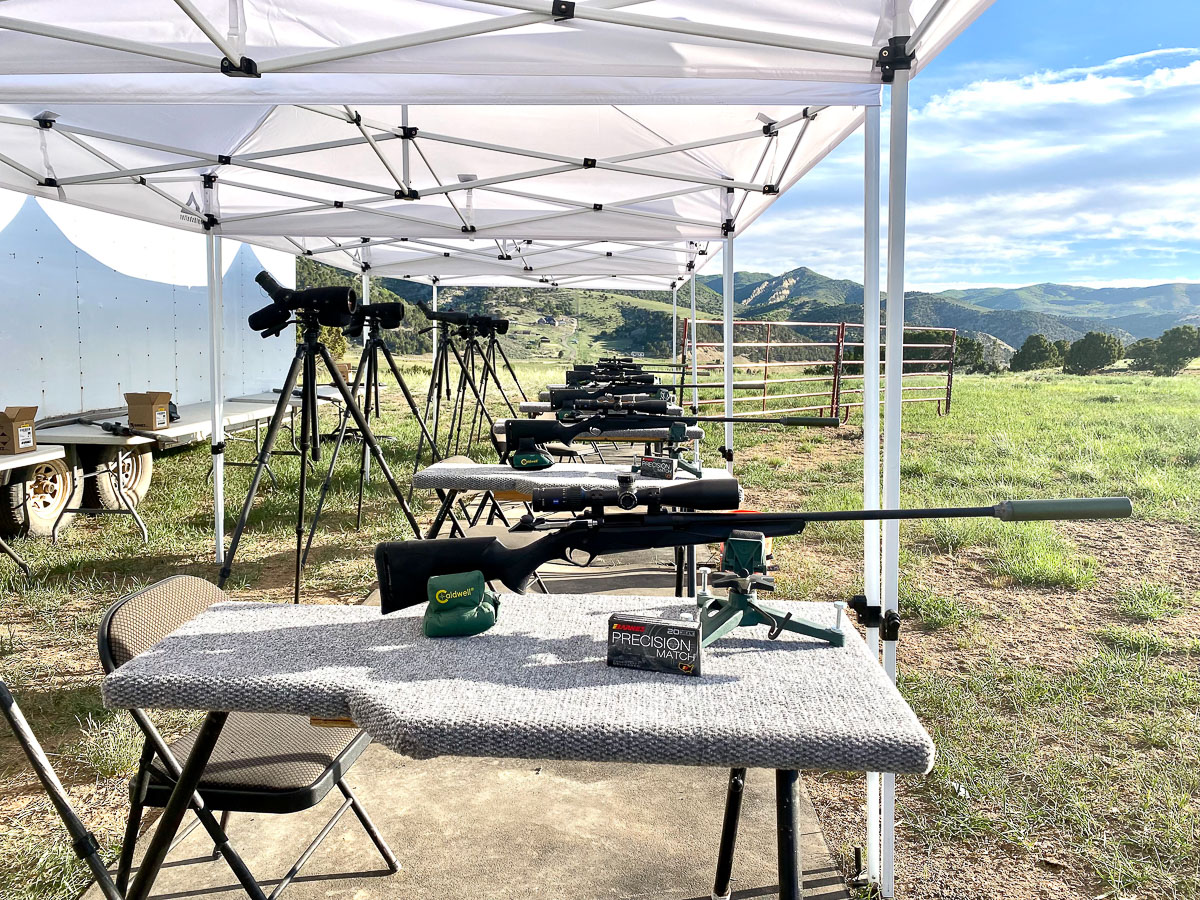
We got to the range early, a sunny day with wind building as the morning wore on. We stood under an awning and listened as Lund gave us a safety briefing, and then we split up into pairs, with each pair selecting a shooting table.
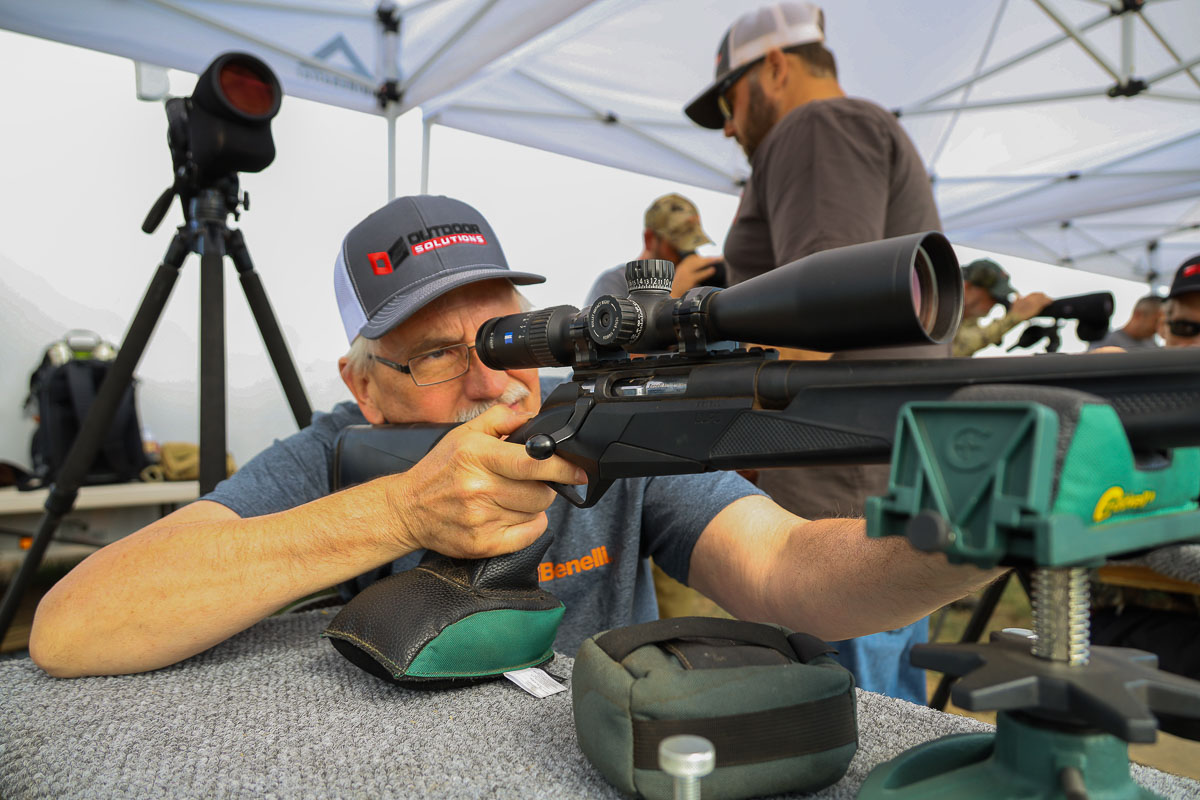
Each shooter was provided with a Benelli Lupo chambered in 6.5 Creedmoor and topped with a Zeiss Conquest V4 6-24×50 rifle scope. Our ammunition was Barnes Precision Match in 6.5 Creedmoor firing a 140-grain boat tail bullet. Our rifles were suppressed, too, with AAC Jaeger 30’s.
It should be noted that Lund and our other two instructors, Eric Suarez and Ryan Pettis, had impressive military shooting and sniper credentials. Now as civilians, they shoot long range competitions and are also life-long hunters.
3 MOA Out to 1,000 Yards
We zeroed our rifles on paper at 100 yards, then shot more paper at 200 yards, taking turns shooting and spotting for our partners. Then the real work began as we stretched out to the 3 MOA steel targets at 100-yard intervals out to 1,000 yards.
Now, some of us wanted to simply aim above the targets as the distances increased to make up for bullet drop, especially at ranges of 500 yards and under. But our instructors stressed the need to use our elevation dials to compensate for bullet drop. A 3 MOA drop at 500 yards, for example, equaled approximately 15 inches, and 15 inches at five football fields distance is very hard to determine through a rifle scope.
Of course, we had to know the holdovers needed at various distances and that meant consistently using our GEO Ballistic app. This took some getting used to, but we were soon able to take the holdovers shown on the app and dial our elevation accordingly.
A few of us had problems, initially, hitting steel even at 300 yards. An instructor would then watch that shooter carefully and nearly always the problem was one of two things. The shooter was either slapping the trigger instead of giving it a steady squeeze. Or, the butt of the stock wasn’t tucked into the shoulder, riding high with half the butt or more not making contact with the shooter. Both errors produced a wobble that threw off the shots.
We took it out to 700 yards before breaking for lunch, all shooters making solid hits on the targets. We experienced misses, too, especially as we learned to adjust for the wind. But every stage provided practice and confidence building, and we returned from lunch eager to take on the next three sets of steel and complete the 1,000-yard challenge.
Respecting the Wind
All 15 of us made repeated hits at 1,000 yards, but all of us also received a hands-on education in shooting during windy conditions. A big part of what we learned came during our time spotting for our partners. Even a slight wind at 500 yards, for example, the kind that gently shifted the grasses below the target, called for a wind hold adjustment. Our instructors urged spotters to pay particular to the movement of the grasses and brush near the targets and to not be shy about suggesting a wind call.
Here, as our instructors suggested, we dialed our elevation knobs to make up for bullet drop but held to either side of the target to make up for wind drift. Which, our instructors told us, was the norm for professional distance shooters.
Establishing Limits
This shooting was in many ways a trial and error process, and it really drove home what Ray had emphasized the night before: extreme distance hits were very possible, on steel. But with wind and other elements, such shots should almost never be attempted on game animals.
“We help the hunter find that distance—the distance where he or she can make a clean, ethical shot on an animal,” Ray told me. “And the shooting we do also shows them when the distances are too far, and when that deer or elk is out of range for them.”
At the same time, the more extreme distances gave Joseph and the rest of us not only practice, but a self-assurance based on our shooting success. A 300-yard shot with the bullet striking at or very near the bullseye seemed like a gimme by the end of Day One, even with a 10 miles per hour wind pushing from one side or the other.
Practical Shooting Conditions
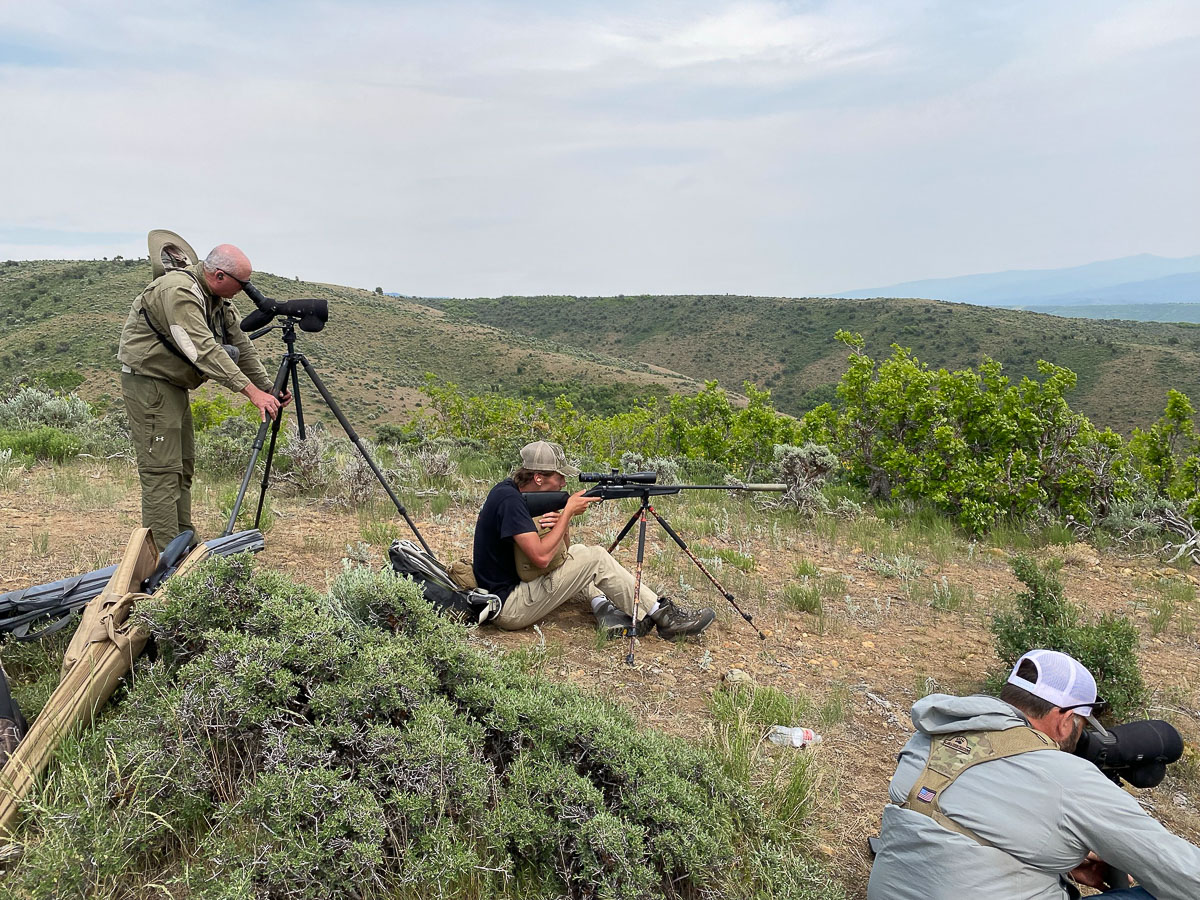
Day Two and the shooting got really challenging. We drove up into the nearby mountains and spent the day shooting at steel from various positions: prone, sitting, sitting with our backs to a slope, off shooting sticks, and using trees, stumps, logs, and rocks for rests.
Our steel targets were located up steep slopes, at the bottom of deep gullies and just visible between cedar trees. Distances ranged from 150 yards to 680 yards.
The idea was to mimic positions a hunter might find afield. Our instructors showed us various ways to “build” a shooting position, using the above-mentioned logs and rocks, for example, and maybe aided with a backpack pushed under our shooting elbow.
“I think one of my key takeaways from the course was the importance of getting steady before you take a shot,” Joseph said of his Day Two shooting experience. “The instructors not only provided resources and guidance on how to get in comfortable shooting positions, but also the patience to let us find out what works best for us. I think that’s been a key mistake in previous hunts for me, and from I learned it’s truly worth the extra time to make sure you are set before you even think about flipping the safety off.”
Using Shooting Bags
One thing that really helped us get steady were the very lightweight shooting bags our instructors encouraged us to use. Weighing no more than several ounces, the foam-filled bags were easily tucked under a shooter’s elbow or filled in the space between a forearm and a tree branch.
When shooting prone, we slid that same bag part way under the chest. This raised up the head and neck into a more comfortable position, and actually made it easier for to breathe.
The shifting and gusting winds were a real challenge, too. On one target the spotter would tell the shooter to hold into the wind 2 MOA or more and the shooter would make a solid “ping” on the steel 450 yards away. The very next shot, taken seconds later and with the same hold would kick up soil a foot to the right—right where the shooter was aiming for the wind hold.
Read Next: The Everyman’s Approach to DIY Archery Elk Hunting
Joseph planned to use his new-found knowledge this very fall on an elk hunt he and his father have set up.
“I would definitely feel comfortable taking a 400-yard shot on an elk, given that I could get into a good shooting position like our instructors advised,” Wolfe said. “The second day of the course had me doing a 400-yard shot and then a 600-yard immediate follow up shot. The 400-yard shot was automatic. I knew that bullet was going to hit when I would squeeze the trigger.”