We may earn revenue from the products available on this page and participate in affiliate programs. Learn More ›
A Bayou Snorkels kit (www.bayousnorkels.com) includes everything you need to keep clean, dry air flowing into your airbox and in and out of your clutch belt system. While installation may look like quite a project, following these steps will have you waist deep in the sticky stuff quicker than you’d think. We grabbed a kit for the Kawi Brute Force 650i to install on our stocker at work.
Step 1
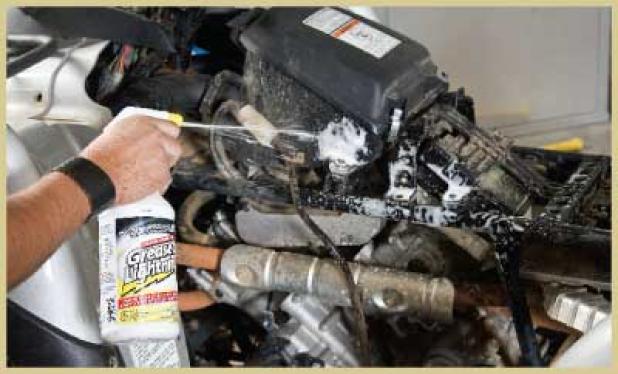
Start by removing both side panels. On the newer model Brute Force there will be a small blacksplash guard connected to the fender with rivets. Drill the rivets out and remove this piece from both sides. With both side panels removed, spray the engine and intake area liberally with a good degreaser such as Simple Green or Greased Lightning.
Step 2
Thoroughly pressure wash the engine, clutch covers and intake area. Dry completely with compressed air and then remove the transmission exhaust snorkel system completely. Remove the belt intake snorkel leaving the rubber boot connected to the transmission intake port. Remove the front cover from the airbox to provide access to the intake tube.
Step 3
The Brute Force snorkels get centered in the front plastic–on other applications you need to refer to the instruction sheet to figure out what mounting location will be easiest to route the snorkels through. Using a hole saw, drill out a 2.5-inch hole for the intake and two 2-inch holes for the transmission intake and exhaust. Insert the 2-inch and 1.5-inch male threaded couplings from the bottom up through the holes, screwing the female couplers on top to sandwich the plastic.
Step 4
Starting with the transmission belt exhaust vent, you will have to use a series of rubber couplings, 90-degree fittings, 45-degree fittings, and a 1.5-inch plastic pipe to route to the 1.5-inch coupling you mounted in the plastic. Repeat the steps for the clutch exhaust, as well. If you are using a pre-packaged kit from Bayou snorkels, it will include very detailed instructions as to which fittings and the order they need to be installed. If building from scratch, expect to make multiple trips to the hardware store.
Step 5
For the intake you will need to construct a snorkel from the airbox intake tube to the 2-inch coupling that you installed into the front plastic. Start with a coupler that will allow you to run a 2-inch pipe and connectors. It may be necessary to use many different fittings to weave in and around the frame, radiator hoses, and assorted brackets.
Step 6
Take a 12-inch section of the 2-inchpipe and two 12-inch sections of the 1.5-inch pipe and install a 90-degree elbow on one end of each piece. For a cool, professional look, tape off the bottom inch of the pipe and paint all three pieces with spray-can bed liner. This can be purchased at an automotive store or Wal-Mart. Once dry, remove the tape and glue and install the piece into the three couplers.
Step 7
Now you will need to snorkel your vent lines for the differentials, carbs, radiator, etc. This can be done by completely replacing the lines with longer hoses or with the use of hose splice connectors (as shown). Once the vent hoses are all lengthened, route them securely away from moving parts and hot exhaust, running them up to and attaching to the snorkels on the front of your ATV.
Step 8
You can add additional support and keep the snorkels straight by zip-tying them together. Replace the side plastic and the seat, as well as any other body parts you removed. Give it a test ride. If the quad is running lean from increased airflow you can install a “2-inch to 1.5-inch flush reducer” into the end of your airbox intake snorkel. If this does not fix the problem, you will have to reset for the increased airflow.
Snorkel Tips:
Once you have completed each individual snorkel and are satisfied with the alignment, you should mark and glue each section individually with ABS pipe glue (it will not be necessary to glue threaded sections together). Be precise–ABS pipe glue sets extremely fast and isn’t forgiving. If you happen to make a mistake, try heating up the section with a heat gun and flexing it. This will not work on drastic mistakes but can save you a trip to the hardware store if the part is only slightly off.

