Whether trekking through thick woods after grouse, tramping open fields for pheasants or hunkering down in a blind and waiting for ducks, we all want to be able to shoot as well as we can when the opportunity arrives. Usually we learn through experience, but the advice of veteran hunters can provide some shortcuts to excellence. To help improve your wing-shooting this fall, Outdoor Life solicited tips from a quartet of dedicated shotgunners. Here’s their input.
Pattern for Perfection
Ed Kaltreider of Montana has traveled the world, shotguns figuratively in hand. He eats, lives and breathes shotguns just about every day of his life. He started with a $100 H&R; single-barrel, then moved to a $300 gun, then a $3,000 gun and finally to even more expensive ones. He suggests, “Most any shotgun can work just fine, depending upon where it shoots.”
That “where” is the critical key. Kaltreider believes too few shotgunners pattern their shotguns. The main reason for patterning is to determine point of impact. Does the gun shoot straight? Test-fire from a rest at some specified distance. You might be surprised by how many shotgun barrels print their patterns too far left, right or low. Such deficiencies can be corrected with the help of a gunsmith.
A second reason for patterning your guns is to confirm what you hope about how the gun handles different shot and chokes. Is the pattern as dense at 40 yards with No. 6 shot as you expected? How about with No. 4? Does that full choke actually put more than 70 percent of the pellets into a 30-inch circle at 40 yards? Or can you only count on 65 percent? Is that skeet choke as open as you figured with No. 9 shot? What about with No. 6?
The answers will either reassure you or convince you that you need to keep searching for the right combinations of gun and chokes.
** Prepare to Shoot**
I hunt grouse with Jim Buzzard almost every day of our Pennsylvania season. Despite only a two-bird limit in our state, Jim flushes over 800 ruffed grouse almost every year. I have no doubt that he is always prepared for any shot that is presented to him, whether he takes it or not.
In grouse coverts, one can never be sure when a bird will flush. That’s why Buzzard hunts as if his next step will send a grouse skyward.
“Always be ready,” Buzzard advises. “Don’t hold the shotgun out too far on the forend with your left hand. Doing so becomes too tiring after only a short time. Instead, slide the left hand back toward the receiver, and rest the inside of your left arm on your left side. Rest the inside of the right forearm against the flat of the gunstock. This takes a lot of the gun’s weight off the arms, but you’re still ready to bring the gun into play instantly.” Left-handed shooters should reverse this advice.
Footwork is critical, whether you’re walking in on a point or just working some good-looking cover. Assuming you’re right-handed, be constantly aware that you want to lead with your left foot when a bird comes up. Given the limitations of terrain and cover, it’s not always possible, but do it if you can. “Body position is just as important as foot position,” says Buzzard. “As you want to be leading with your left foot, you also want your body slightly turned, with your left shoulder sort of leading the way. With such an approach you can still swing well to the right, and a right-handed shooter can always swing well to the left.”
After one shot, pause a few seconds, anticipating another flush. Next, reach for a spare shell before opening a two-barreled gun. Have that next shell ready to load instantly after opening the gun. Many hunters have a tendency to open the gun first, then reach for a shell. Often, that’s when a bird will break from cover.
Read the Shot
Ed Moxley manages and maintains his own duck marsh near Sandusky, Ohio. He’s gone throough several cases of shells there, usually with satisfactory results. He’s shot at waterfowl at various ranges from near to far, and has learned that one key to consistency is being able to judge ranges. As Moxley is fond of saying, “Success increases as range decreases.”
In other words, the factor of lead becomes less important as the bird gets closer. Learn how to estimate ranges at 25, 35 and 40 yards and how those distances affect required lead and shot placement. Pace off the distances. Use a range finder if you have to. Practice shooting at clay targets at various ranges until the distances are imprinted on your brain.
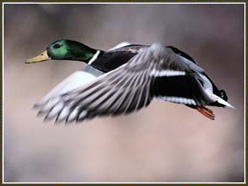
Moxley also thinks it’s important to “read” the flight pattern of a dove or duck, which helps you make better decisions about when to take the easiest shot. For example, suppose you spot a single drake mallard that is coming straight at you, but its wingbeat suggests that it has business elsewhere. Its flight path will take it directly overhead and within range. Do you shoot while it’s coming toward you, as it’s passing overhead or as it’s flying away? Many hunters have the tendency to wait too long and shoot at the duck going away. But the best shot will be presented when the drake is passing directly above the hunter and its vitals are exposed.
When is the bird going to be closest to you? That’s when the bird is the most vulnerable.
Rehearse at Home
Gil Rodler has won more Pennsylvania State Skeet Shooting Championships than anyone. When he isn’t practicing at the range, chances are he’s out hunting. Most sportsmen don’t have the shooting opportunities that Rodler has, but nevertheless it’s possible to improve shooting form without ever firing a shot.
“It’s a good idea to mount your gun in front of a mirror regularly,” says Rodler. “Doing so will help with your gun-mount technique, plus it will give you a good indication of how well your gun fits and if there are any corrections that need to be made there.” To determine shotgun fit, first pick out a reflected spot in the mirror. Concentrate on it. Close your eyes. Mount the gun. Then open your eyes. See how close you came to being on the money with the barrel. Hopefully, you’ll be close or dead-on. Regardless, this practice routine will improve your score at the range or your ability to get on a bird quickly in the field.
A Balanced Approach
When you’re hunting or walking in on a point, don’t look at the ground, advises Rodler. Cast your gaze a few feet above where a bird is likely to flush. It will help you develop the skill to pick up a rising game bird in your peripheral vision so you can lock your focus on the target faster. “You must also focus on staying in balance physically,” notes Rodler. “If a bird flushes and you’re not well-balanced when it happens, either you’re not going to shoot well or the bird is going to be gone by the time you do get set.”
Regardless of what type of game birds you hunt, practice on clay targets as often as you can. The more you do, the more familiar you’ll become with your gun and the mechanics of mounting it and shooting it correctly. You’ll also become better at gauging distances and judging leads. Once in the field, every shot you take is likely to put you closer to filling your limit.
Questions? Contact Nick Sisley at nicksisley@hotmail.com.

