We may earn revenue from the products available on this page and participate in affiliate programs. Learn More ›
Choosing shoes is the most important gear decision to make before a thru-hike. But with so many options to sift through, each with its own dedicated fanbase, it can be hard to know which is right for you. Do you need a cushioned shoe like the Hoka Speedgoat? Are hiking boots really such a bad idea? Is everyone wearing Altra Lone Peaks? To help you narrow down the best thru-hiking shoes to find the one that will work best for your foot shape, strike pattern, and mobility, I talked to Morgan Brosnihan, a physical therapist who specializes in thru-hiking.
- Best Zero Drop: Altra Lone Peak 7
- Best Low Drop: Topo Ultraventure 3
- Best Rocker Bottom: Hoka Speedgoat 5
- Best for Boot Wearers: Brooks Cascadia 16
- Best High Drop: Salomon XA Pro 3D V 8
- Most Comfortable: Altra Olympus 5
- Best Barefoot: Vivobarefoot Primus FG
What Thru-Hikers Need to Know
Morgan Brosnihan, a doctor of physical therapy who completed her Pacific Crest Trail thru-hike in 2019, has spent the last several years helping thru-hikers overcome foot-related injuries through her company Blaze Physio. While she provides online consultations, she also travels to trail towns to consult with thru-hikers one on one. She has treated thru-hikers from all walks of life with all manner of foot injury—and using a wide variety of shoes. She shared her insights into common mistakes that thru-hikers make when selecting their footwear, and what aspiring thru-hikers need to know as they start their search for the perfect shoe.
The “Best” Thru-Hiking Shoe
First the bad news: There is no one best shoe for everyone. “Every shoe has a perfect scenario, and a horrible scenario,” says Brosnihan. “The absolute best shoe for one person will be the absolute worst shoe for another.”
Something Brosnihan stresses when you talk to her is that everyone’s feet are different. What works for one hiker can result in hike-ending pain for another, particularly with the ubiquitous Altra Lone Peak. But it’s also hard to be sure that you’ve chosen the right shoe until you’re out there, pounding out 20 to 25 miles a day.
“No shoe has specifically higher injury rates. It’s just about finding the one that meets your needs and that you are properly trained for,” she says. She also noted that some people are able to wear almost any shoe and get away with it, which can make finding sound advice difficult for aspiring thru-hikers.
Three Factors to Consider
Brosnihan described three main factors that thru-hikers should consider when choosing their shoes: minimalist versus maximalist (refers to the cushion), narrow versus wide, and high drop versus low drop (referring to the height differential between the heel and the toe). She says that switching more than one of these factors at a time can lead to injury. So if you’re used to wearing boots and want to make the change to trail runners, you need to take a gradual approach. Build up your training by 10 to 15 percent a week until you are able to walk 10 to 15 miles with a fully loaded pack.
Finding Comfortable Shoes
Before committing to a shoe, Bronsihan recommends that first-time thru-hikers start by choosing five different pairs of shoes. Find likely contenders based on their mechanics, and then narrow down those options by comfort to two or three pairs. (Studies have shown that comfort is highly correlated with injury reduction.) While you’ll only be taking one pair of shoes on the trail, having a backup in mind can be enormously helpful. When you are far off grid with no chance of making it to a big box store to try on more shoes, you’ll be glad to know what backups work for you.
Hikers should also anticipate that their footwear needs may change throughout their hike. Going up a shoe size is common for thru-hikers (I went up two during my first thru-hike), and most people’s feet will end up wider than what they started with. Some individuals may also find that their arches flatten out. Brosnihan recommends sizing up a half size to start, especially if you are beginning in a desert section of a long trail, like Southern California on the Pacific Crest Trail. The perfect shoe fit is also a bit looser than some people are used to: “You should be able to put your pinky behind your heel and your thumb in front of your toe at the same time.”
How Long Shoes Last and Changing Up Shoes on the Trail
Thru-hikers can expect to change out their shoes every 300 to 500 miles. Brosnihan is adamant that letting it go any longer than that is a mistake that can lead to stress injuries. However, hikers should not purchase all of their footwear in advance. Plan to purchase your shoes online as you hike and have them sent to a resupply point farther up the trail. This gives you some flexibility to switch between different styles of shoes if your foot needs to change during your hike. “On my 2019 Pacific Crest Trail thru-hike I wore three different types of shoes,” said Brosnihan. “I started in Hoka Speedgoats, and then I went to Topos, and then I went to Challengers.”
Train in Your Shoes
Finally, something that Brosnihan emphasized repeatedly in our conversation was the importance of training. No matter what shoe you choose, it’s important to get regular daily mileage with a pack before you head out on a thru-hike. This will help to strengthen your feet and dramatically reduce the likelihood of injury once you start putting in the real miles. For anyone who is transitioning to a zero-drop shoe, this goes double. Expect it to take six to 12 weeks of dedicated strength training with a pack to transition from a traditional heel drop (8mm) to a zero-drop shoe.
Best Thru-Hiking Shoes of 2024: Reviews & Recommendations
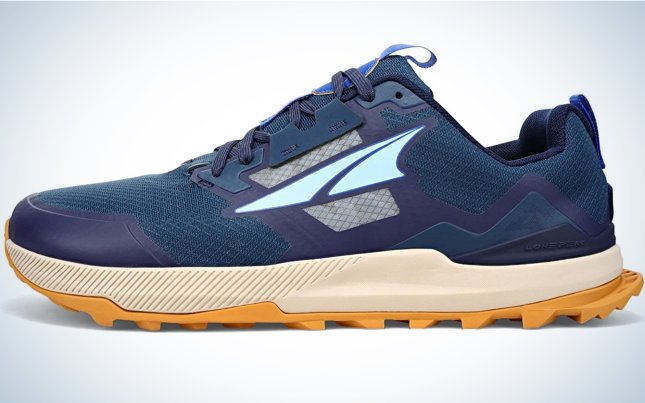
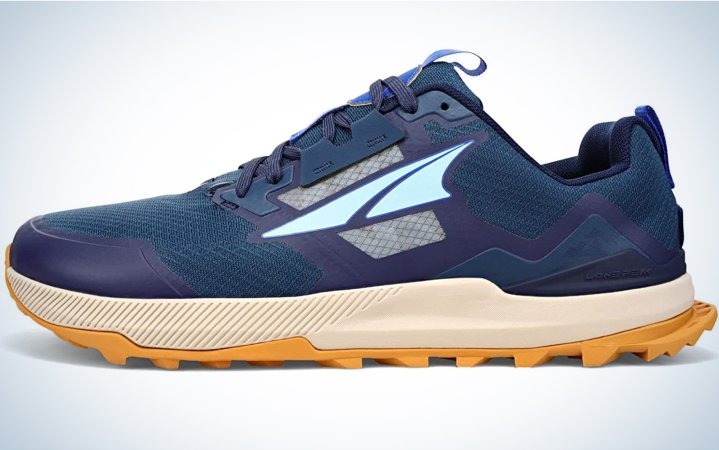
Best Zero Drop: Altra Lone Peak 7
Best Zero Drop
Altra Lone Peak 7
Pros
- Comparatively low stack height can help prevent ankle rolls
- Zero drop can help to strengthen feet (over time) and reduce knee issues
- Wide toe box and roomy sizing can help prevent blisters
Cons
- Can lead to injury if your feet, ankles, and calves are not sufficiently trained up
- Popularity on trail can give the impression that this is a good shoe for everyone
- Shorter life span than other picks on this list
Key Features
- Neutral support
- Less cushioned
- Heel Drop: 0mm
- Stack Height: 25mm at the heel
Thru-hikers have been singing the praises of Altra Lone Peaks for years, and for good reasons. The Lone Peak is one of the most comfortable trail runners out there. Its wide base (especially the toe box) allows for foot growth and minimizes blisters. It also supports a midfoot or forefoot strike, with all the accompanying ergonomic benefits.
But the Altra Lone Peak is not the shoe for everyone. Its growing dominance on trail is leading to problems. Brosnihan says, in large part due to its popularity, she sees people having more trouble with this shoe than any other. If you are a natural heel striker with limited ankle and toe flexibility, you should avoid this shoe. Start your hike with another trail runner on this list. Even if you do have the strike pattern and foot flexibility to take on this shoe, be sure to exercise your foot and lower legs in it heavily (with a loaded pack) before starting out on trail. Calf strength is essential to avoiding injuries with a shoe like the Altra Lone Peak.
Brosnihan also noted that the Altra Lone Peaks have a shorter life span than other trail runners out there. While several options on this list can make it out to 500 miles, this shoe is really only good for up to 300.
Read the Outdoor Life gear team’s review of the Altra Lone Peak 6 to learn more.
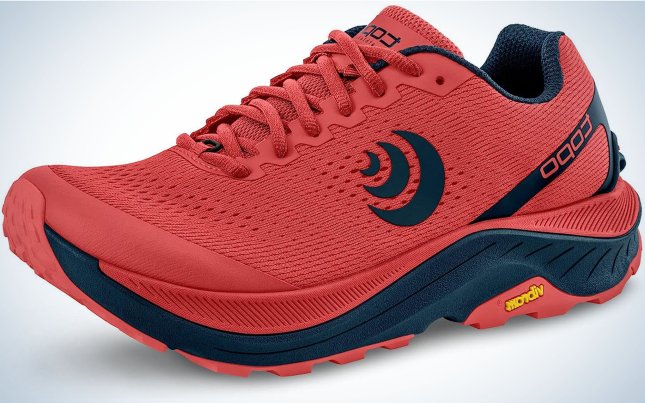
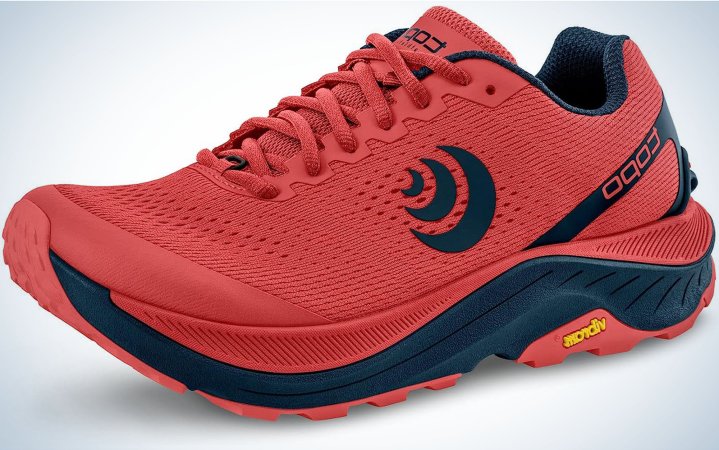
Best Low Drop: Topo Ultraventure 3
Best Low Drop
Topo Ultraventure 3
Pros
- Wide toe box (although not as wide as the Altras)
- Low heel drop allows for less flexible ankles while still supporting better ergonomics
- More stability and support than the Altras
Cons
- Not a true neutral, zero-drop shoe for those looking to go minimalist
- Less supportive than other picks on this list
- Not available in wide
Key Features
- Moderate support
- Medium cushion
- Heel Drop: 5mm
- Stack Height: 35mm at the heel
The Topo Ultraventure has been gaining popularity in recent years. It splits the difference between more traditional trail runners like the Brooks Cascadia and the minimalist Altra Lone Peaks. Like the Lone Peaks, it has a wide base, particularly in the toe box. This supports some foot growth and allows toes to splay. The biggest difference is the increase in stability in the midsole. This makes it a more forgiving option for hikers with pronation issues. The slight heel drop also supports less flexible ankles.
Best Rocker Bottom: Hoka Speedgoat 5
Best Rocker Bottom
Hoka Speedgoat 5
Pros
- Supportive midsole can help reduce ankle rolling
- Great option for individuals with tight ankles and toes
- Extra cushion feels great to many thru-hikers
Cons
- High stack height can increase ankle rolling
- Somewhat narrower toe box than the Altra Lone Peak
Key Features
- Maximum support
- Maximum cushion
- Heel Drop: 4mm
- Stack Height: 33mm
In the great maximalist versus minimalist debate, the maximalists’ clear choice has long been the Hoka Speedgoat. The extra-cushioned midsole provides plenty of support and relief for tired feet, and its mid-heel drop means you can still accrue some of the benefits of a midfoot strike pattern (without punishing you if you are a heel striker).
Brosnihan notes that the rocker bottom on this shoe (the distinctive banana curve) also makes this an excellent choice for individuals with tight ankles and big toes. More traditional shoe shapes rely on the bend of your foot to handle all the motions in a gait cycle. As your foot hits the ground and your shin moves past your ankle, you push off again with your big toes. If any of those motions cause strain, then a rocker bottom can help to alleviate discomfort so you can hike farther and faster.
This shoe has a much more supportive midsole than the Altra Lone Peaks. However, Brosnihan says that the stack height of the Hoka Speedgoats can actually result in more ankle rolling for some people.
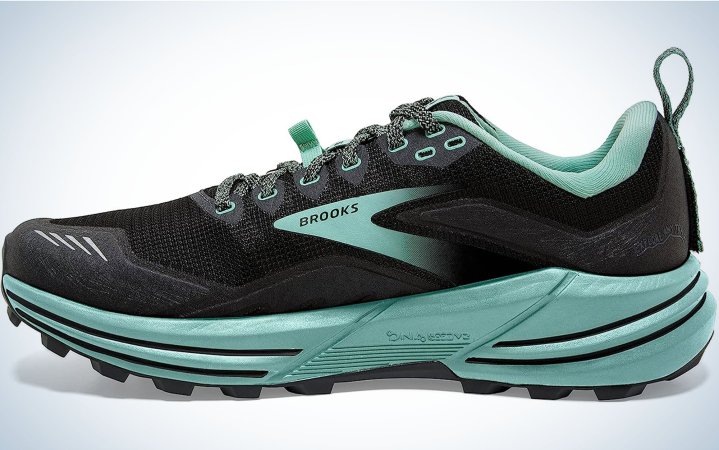
Best for Boot Wearers: Brooks Cascadia 16
Best for Boot Wearers
Brooks Cascadia 16
Pros
- High heel drop makes for an easier transition for boot wearers
- Good arch support
Cons
- High heel drop discourages a midfoot strike, which can lead to knee issues
- Not available in wide
Key Features
- Maximum support
- Maximum cushion
- Heel Drop: 8mm
- Stack Height: 20mm
If you’ve been backpacking in boots or hiking shoes and are only looking at transitioning for your thru-hike, then a word of warning: Your feet have a lot of learning to do. Supportive, cushioned hiking boots that hug your foot do not develop foot strength at the same rate as less supportive trail runners. Switching without properly training your feet can lead to issues like plantar fasciitis.
But you can get a lot of the benefits of lightweight trail runners without having to completely retrain your foot. The Brooks Cascadia heel drop mirrors that of many hiking boots. Its cushioned midsole with good lateral support and arch support helps take care of your feet. It even had a narrower fit, mirroring the mold of hiking boots. Brosnihan noted that this shoe was especially good for individuals with ankle issues.
Best High Drop: Salomon XA Pro 3D V8
Best High Drop
Salomon XA Pro 3D V8
Pros
- Similarities to hiking shoes will appeal to some new thru-hikers
- Support and protection can help prevent injuries for individuals with weaker feet
Cons
- Unusually high stack height can affect your strike pattern and lead to knee issues
- Less breathable than other options on this list
Key Features
- Maximum support
- Moderate cushion
- Heel Drop: 11mm
- Stack Height: 25.2mm
If you are hesitant to switch from your current hiking shoes at all, then the Salomon XA Pro 3D V8s are worth experimenting with. They are more of a hybrid trail runner–hiking shoe than other picks on this list, with an usually high heel drop. But they are still lightweight and breathable, which is essential for pounding out miles and reducing blisters. And when the near inevitable foot growth occurs, Salomon offers these in a wide.
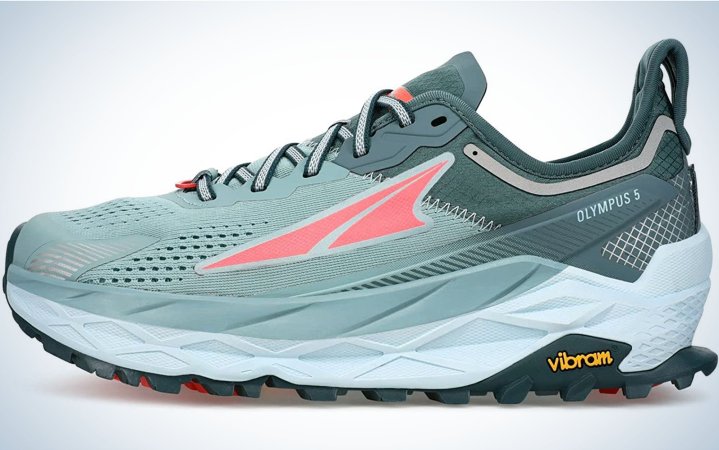
Most Comfortable: Altra Olympus 5
Most Comfortable
Altra Olympus 5
Pros
- Zero heel drop supports similar ergonomics to the Altra Lone Peak
- Plenty of cushion if more minimalist shoes aren’t a fit for you
Cons
- Lack of a rocker bottom means this isn’t a great fit for people with stiff toes and ankles
- Slightly narrower toe box than the Altra Lone Peaks
Key Features
- Neutral support
- Maximum cushion
- Heel Drop: 0mm
- Stack Height: 33mm
If you love the Altra Lone Peaks but don’t love the lack of cushion, then the Altra Olympus might be the shoe for you. It adds in a substantial amount of cushion with 5mm contour insoles. The Olympus retains the features that have made the Lone Peak such a hit with thru-hikers: the zero drop and wide toe box. Brosnihan recommends that if you are at a shoe store checking out the Lone Peaks that you try out a pair of the Olympus at the same time. That way if you run into trouble with the lack of cushion of the Lone Peaks on trail, you’ll know if its maximalist Altra counterpart will work for you.
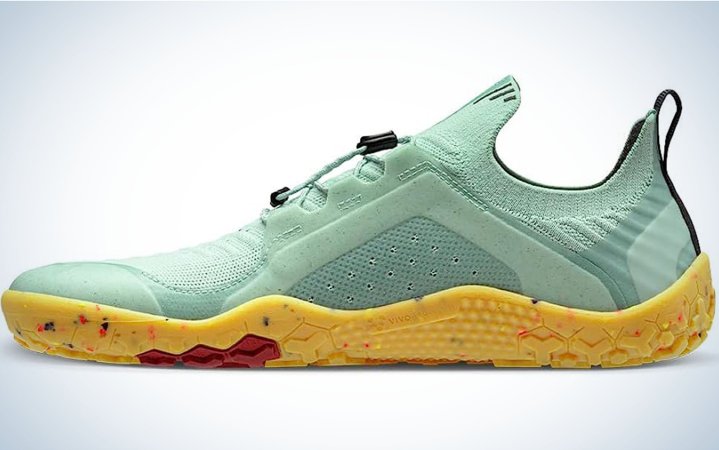
Best Barefoot: Vivobarefoot Primus FG
Best Barefoot
Vivobarefoot Primus FG
Pros
- True barefoot shoe with a low stack height and zero heel drop
- Better traction and protection than other barefoot-style trail runners
Cons
- Can only be used by individuals fully accustomed to barefoot style shoes like Vibram Fivefingers
- Not available in wide
Key Features
- No support
- No cushion
- Heel Drop: 0mm
- Stack Height: 5.5mm
When I mentioned the Vivobarefoot Primus FG—my go-to for my Colorado Trail thru-hike—to Brosnihan, she hesitated. “I think people should analyze what their goals are,” she began. “The whole premise behind the barefoot shoes is to allow a natural foot pattern and full splay and foot strength. If you want to take that route, and there are benefits, you have to be willing to commit on both sides of the hike. They have to do the work ahead of time to reap those benefits. It’s not a ‘put these on and all your problems go away’ kind of shoe.”
This advice tracks with my experience. I had run in barefoot shoes for years prior to my first thru-hike (the first few months of which were extremely humbling). They’re all I’ve worn after my Colorado Trail hike because other styles of shoes no longer work with my feet. But I’ve also known plenty of people that tried to make the switch and found that it just didn’t work for them. You don’t want to find that out in the first two hundred miles of your thru-hike.
If you’re already a barefoot shoe person and the stack height on the Lone Peaks is giving you major pause, the Vivobarefoot Primus FG is a great option. It preserves the zero drop, low stack height, no arch support, and foot splay you are accustomed to while adding in some toe protection, robust upper, and some serious lugs.
Things to Consider Before Buying Thru-Hiking Shoes
While some first-time thru-hikers have been using the best trail runners for years, plenty of individuals are considering making the switch for the first time. If you have been using one of the best hiking shoes or hiking boots, there are a few things to know about your own foot before choosing a pair of shoes.
Length and Width
While knowing your correct shoe size is important to finding correct fitting thru-hiking shoes, it’s also important to know your foot’s width. Brosnihan explained that many blisters result from poor-fitting shoes, and that too-narrow shoes can result in bunions. Keep in mind that even if you start your hike with a standard width foot, it’s more likely than not going to expand over the course of your hike.
Pronation
Pronation refers to the movement of the foot to the side as you step down and transfer the load of your body to it. A neutral pronation would show no left to right movement. When the foot shifts outward, toward the pinky toe side, it is called supination or underpronation. Individuals who underpronate will be more likely to roll their ankles. Overpronation is when your foot leans in toward your arch.
According to Brosnihan, a way to see if you over or under pronate at home is to take a heavily used pair of shoes and put them side by side on a table. If the shoes themselves naturally lean to one side, that’s a strong indicator of the direction of pronation. Hiking in unsupportive shoes for those that pronate heavily in one direction is mechanically similar to walking on a side slope. Do that all day, every day, and injury will likely result.
If you under or overpronate—or are prone to rolling your ankles—look for shoes that have a thicker, stiffer midsole, as this will provide more lateral stability.
Ankle and Big Toe Mobility
Facing a wall, get into a half-kneeling position with your front knee and toes both touching the wall. Keep you knee against the wall and slide the heel back as far as you can. Stop when the heel starts to lift up. You should be able to get the width of your hand between your toes and the wall for optimal ankle mobility. If you can only get your knee an inch or two past your toes, you might do best to start with a higher drop shoe. Work on eccentric calf raises and ankle mobilizations to improve ankle mobility.
To test big toe mobility reach down to the front foot in the kneeling position and lift the big toe up keeping the rest of the foot flat. Ideally you can lift the toe to about a 40 degree angle without pain. If there is stiffness in the big toe then a rocker bottom shoe may be your best fit.
Strike Pattern
One of the biggest decisions to make in thru-hiking footwear is between minimalist shoes, which have a bare minimum of foam in the midsole (like the Altra Lone Peak) and maximalist shoes, which are heavily cushioned (like the Hoka Speedgoat). Whether you need the extra cushion of a Hoka depends on your strike pattern. If you have a light midfoot strike when you walk, you may do better with a minimalist shoe. While people with a harder strike, particularly heel strikers, will benefit from a maximalist shoe. Brosnihan further noted that while it is possible to consciously change your strike pattern, you shouldn’t expect it to change just because you’ve changed shoes.
If you are transitioning from a traditional hiking boot or shoe, keep in mind that most trail runners have a lower heel drop, which can affect your strike pattern.
Arches
You can assess what kind of arch you have at home using the foot posture index, but if you have a history of foot problems, Brosnihan recommends consulting a podiatrist or PT. They can thoroughly evaluate your foot. In addition to looking at the height of your arch, it’s also important to check whether they stay or collapse while you walk. Individuals with a history of problems in this area may benefit from one of the best insoles for hiking.
Brosnihan notes that individuals with flatter arches may have more issues with plantar fasciitis. Hikers should be aware of whether their arches are flattening out over the course of their hike. The day-in, day-out repetitive motion of a thru-hike coupled with a heavier load can lead to plantar fasciitis.
Calf Strength
Brosnihan has seen in her time treating thru-hikers that one of the biggest issues with switching to trail runners with a lower heel drop is a lack of calf strength. She recommends that first-time thru-hikers take special care to strengthen their calves. Do this by carrying a backpack while wearing the shoes you plan to thru-hike in.
Still Have Questions?
If you are unsure about what kind of thru-hiking shoe you should purchase based on the above criteria, Brosnihan recommends finding a professional to help you assess your needs. One option, of course, is to consult directly with her by booking a consultation with Blaze Physio. But there are other options as well. Both physical therapists and pedorthists, who often work at running stores, can evaluate your feet. Brosnihan notes that if you get your foot evaluated at a shoe store, be careful that the shoe they ultimately recommend fits your needs. Too often shoe store specialists will recommend an inappropriate shoe, simply because it is what they have in stock.
READ NEXT: What Is Thru-Hiking?
FAQs
The heel drop refers to the height difference between the midsole at the heel and the toe. Most hiking boots have an 8mm or higher heel drop, while typically trail runners have a 3mm to 5mm heel drop. Heel drops serve heel strikers well as they help to cushion their foot and absorb some of the impact that would otherwise go up their leg. For midfoot and forefoot strikers, on the other hand, high heel drops can unnaturally alter their gait.
As the Outdoor Life gear team learned first-hand, going from a high-drop shoe to a low-drop or zero-drop shoe like the Altra Lone Peaks is one of the biggest changes you can make in your footwear. For some people, this switch can reduce pain and open up their stride; for others, it’s the complete opposite and can actually result in more pain than they had in their previous footwear. But one thing we know for sure is that your first day wearing a backpack with a zero-drop shoe should not be your first day on the PCT. If you’re interested in switching to a zero-drop shoe, Brosnihan has some advice for you: “It’s recommended that you have at least 16 weeks of loaded use in them before you bring them on trail,” she says, noting that going from a traditional hiking boot to the Altra Lone Peak is a “dramatic end of spectrum switch.”
“People are still successful in boots,” Brosnihan told me. “That’s all people used to wear, before trail runners came out.” She did note that boot wearers tend to have more issues with Achilles tendonitis and bursitis due to the lack of ankle motion in hiking boots. However this risk may be outweighed for individuals who are accustomed to hiking boots and are not able to make time to train their feet up on trail runners before their hike.
Yes, foot growth during a thru-hike is a well-documented phenomenon, especially for thru-hikes that incorporate a desert section. It is also unpredictable, affecting some thru-hikers not at all and causing others to go up as much as two shoe sizes. For this reason, first-time thru-hikers are strongly cautioned against purchasing all of their footwear in advance of their hike.
No, thru-hiking shoes are not waterproof. Thru-hikers should expect to encounter stream crossings high enough to go over the top of their shoes on a fairly regular basis. Waterproof shoes, once they are wet, take substantially longer to dry out than breathable shoes, which can result in blisters and other long-term issues like trench foot.
Thru-hiking shoes last for 300 to 500 miles on average. Thru-hikers can expect to go through five to eight pairs of shoes during a thru-hike.
Final Thoughts
The right shoe for your next thru-hike depends on a myriad of factors that are specific to your needs: your feet, your current footwear, the time you have available to train before your first day on trail. Finding the right shoe is essential to having a successful hike. Your footwear deserves at least as much attention, if not more, as your backpack and tent choice. Take the time to carefully assess your feet and try out multiple options to find the right fit for you—and don’t let yourself be swayed by someone else’s strongly held beliefs. While the below shoes have proven successful for thru-hikers in the past, they are far from the only options available:
- Best Zero Drop: Altra Lone Peak 7
- Best Low Drop: Topo Ultraventure 3
- Best Rocker Bottom: Hoka Speedgoat 5
- Best for Boot Wearers: Brooks Cascadia 16
- Best High Drop: Salomon XA Pro 3D V 8
- Most Comfortable: Altra Olympus 5
- Best Barefoot: Vivobarefoot Primus FG
